Back to Blog

Ideal logic F2 Error code what is the cause?

Ideal logic F2 error code

With over 4 millions boilers manufactured in the UK at their main factory in Hull, Yorkshire,

The Ideal Logic Combi boiler in all it variations is a very popular choice for homeowners seeking efficient heating and hot water solutions.

However, like any other Combination boiler on the market, it will encounter occasional errors. The error we will discuss in this article is the F2 error code.

This Error code will stop the boiler’s operation and cause inconvenience to yourself especially if your in the shower and the hot water starts to run cold.

Let us explore the meaning behind the F2 error and suggest potential solutions to resolve it.

Understanding the F2 Error

when the F2 error Appears on an Ideal Logic Combi boiler this indicates a flame loss has occurred on start up or during the operation of heating your home or providing hot water.

This error occurs when the boilers flame detection probe calculates that the flame has either extinguished or failed to ignite properly. When the F2 error is displayed, the boiler will shut down to prevent any potential hazards, the fan will run for 30 seconds to evacuate any gas that is unburnt in the heat exchanger and burner.

Possible Causes of an F2 error code

Several factors can contribute to the F2 error.

A faulty gas valve not letting gas through

Low Gas pressure on the gas main

Faulty or broken ignition probes.

Faulty ignition leads

A blocked flue

A faulty spark generator

Faulty flame detection probe

A break or disconnection in the boiler internal wiring

All the faults above will cause the F2 error

There is a fault in the gas supply to your home.

If you have a prepayment meter you may have run out of credit

How to resolve the F2 Error Ideal Logic code

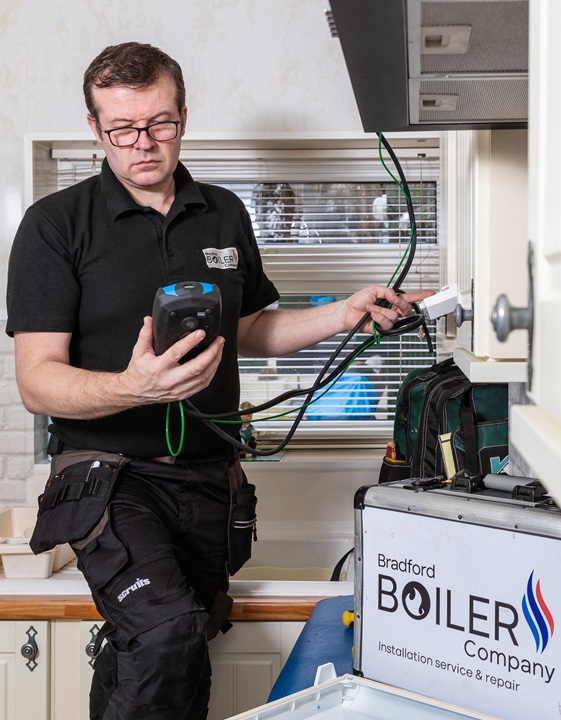
Unless you have ascertained that the problem is caused by the gas supply to your house, then to Resolve the F2 error requires employing the services of a Gas Safe Registered Heating Engineer who is a specialist in repairing Ideal Logic Combi boilers.

They will inspect and diagnose the issue with ideal logic boiler.

They will diagnose the specific cause of the error, and undertake to rectify the issue with the boiler. A gas safe registered engineer will undertake a series of checks to ascertain what is the problem.

They then should give you a quote/ price to fix the issue.

Conclusion

An F2 error code on an Ideal Logic Combi boiler can disrupt the heating and hot water supply to your home so it is a utmost to get the issue quickly, the issue will cause a great inconvenience for homeowners and Tenants.

However by reading this article you have now gained an understanding on the possible causes and seek professional assistance as it is something that cannot be readily fixed by yourself.

A homeowner can promptly resolve the issue by employing the services of a qualified Gas safe registered engineer

they will undertake the necessary diagnostic to identify the issue and carry out the necessary repairs and adjustments can be made to restore your ideal logic boiler to its proper functioning state giving you lovely heating and hot water in your home.

If you don’t have the time to go through all these steps,

Give us a call

You are welcome to give us a call on 01274 317169 or click here to enter your details into our contact us form

We charge an initial £78.00 including VAT to perform an initial diagnostic investigation into the cause.

If the leak only requires something to be tightened up or a slight adjustment there will be no further cost to you.

If parts are required, then a quote for parts and labour will be given to fix the cause of the F2 error code on your ideal logic boiler.

Back to Blog

Why is my Ideal Logic Combi Boiler losing pressure

Ideal Logic Logo

Ideal Logic losng pressure?

Do you have a leak and is your Ideal Logic boiler losing is pressure?

Then this article could help you get to the bottom of what the issue with your Ideal Logic boiler is and why it is losing pressure.

The Ideal Logic boiler comes in different models and sizes. The most common ones are:

Ideal Logic (2-year warranty), Ideal Logic Plus (7-year warranty), Ideal Logic Max (10-year warranty)

There are also models based on the Ideal Logic but have a different fascia (front cover display)

These models appeal to the budget market with fewer features. Some of these models include:

  • Instinct

  • Instinct 2

  •  Independent

  • I Mini

  • Pro Combi Exclusive

  • Esprit Eco

  • Logic ESP 1

Over 4 million have been built over its lifetime, so due to the huge number manufactured, at one point or another, they will break down. After all, it is a machine with moving parts.

An Ideal Logic combi boiler works on a sealed system. This means there is no tank of water feeding your boiler; you have to fill it manually via a filling loop. As a result, the boiler will lose pressure over time, which is a natural occurrence as the water in the central heating system and your Ideal Logic boiler is heated up hundreds and thousands of times. You can expect to have to use the filling loop at least once or twice a year.

So, if you have to fill up your Ideal Logic combi once a day, once a week, or once a month, it would suggest there is a leak somewhere.

Things to  check On Your Central Heating System

  1. A leak in your central heating system pipework. If your pipework has a leak, go around your home and inspect your pipework wherever possible. Use a torch to look for wet patches on ceilings and look under your floors if you have access to see if the central heating pipework is leaking. If you find a leak, either fix it yourself.

  2. Check your radiators and valves. A common place for leaks on radiators is the radiator valves. They will either leak at the compression which connects them to the pipework and radiator or through the top of the valve itself. Check for wet spots on carpets around the radiator valves.

  3. Check the bleed vents where you would bleed a radiator and blanking valves on the opposite side. These can leak from the O-ring seal. A telltale sign would be an orange rust streak running down the radiator.

Other Things to Check

  1. Next, check underneath your boiler. Under your Ideal Logic boiler are a set of valves that help to isolate your boiler for maintenance and repairs. These are connected via fiber washers and compression olives and nuts. Over time, these can leak, so it is a good place to look.

  2. Do you have a magnetic filter? These can have O-ring seals that can leak over time. Check for leaks there as well.

  3. Is the expansion vessel in your boiler faulty? To check if your expansion vessel is faulty, before you turn on the heating, check the pressure level on the pressure gauge of your Ideal Logic and make a note of it. Turn on the central heating via your thermostat or smartphone if you have a smart stat to check two things. Give it five to ten minutes for the system to warm up, then check the pressure gauge. Has the gauge risen? If yes, Then it is likely that you have a faulty expansion vessel. You can also check the pressure relief pipe, most commonly on the outside wall opposite your boiler. Take a look to see if water is coming out of it. It is a little copper pipe which should have a bend facing your house wall to stop scalding and hot water potentially spraying everywhere. If it is leaking water, you have a faulty expansion vessel. In rare instances, the pressure relief valve that is connected to the pressure relief pipe can be faulty and leak water as well.

If you have checked the above parts on your central heating system and still cannot find a leak:

  1. Then there may be a leak inside the boiler itself. If this is the case, you may see water leaking out of the boiler casing. In this instance, you are going to need the services of a Gas Safe registered engineer to check the boiler.

  2. The last cause would be that the internal heat exchanger has an internal crack and is leaking water out through the condensate trap and pipework. To check this, let the boiler stand cold for an hour or so with no heating. Now, this may take a while, but if the system is leaking, fill the condensate trap up, and within an hour or two, the trap will empty. Although in these cases, it is best to employ the service of a gas engineer to check the boiler internally. If the heat exchanger is faulty and leaking, it will need replacing. An approximate cost of £750.00 should be expected to replace it. If you have an old Ideal Logic boiler, it may be cost-effective to replace it.

If you don’t have the time to go through all these steps,

then you are welcome to give us a call on 01274 317169 or fill out the Contact Us form.

check out our best selling boilers

We charge an initial £78.00 including VAT to perform a diagnostic investigation into the cause, and we can advise further once the leak has been identified.

If the leak only requires something to be tightened up or a slight adjustment there will be no further cost to you.

If parts are required, then a quote for parts and labor will be given to fix the cause of the pressure loss of your Ideal Logic losing pressure

Back to Blog

Replacing an Old Inefficient Combi Boiler

In this post we take a the benefits of having a new combi boiler installed as opposed to replacing an old inefficient combi boiler

Take a look at the boilers we Supply and fit.

When it comes to home comfort and energy efficiency. Few other things have a bigger impact than replacing your current Gas combi boiler. If you’re still trying to keep your old gas combi boiler going then it might be time to consider an upgrade to a more efficient gas boiler.

In this article, we’ll take a look at the benefits of replacing your old boiler with a new more energy efficient one. Points such as reliability, energy savings, and cost-effectiveness. We’ll also touch upon the warranty lengths offered by the major manufacturers for additional peace of mind.

Enhanced Reliability

One of the primary advantages of replacing your old gas combi boiler is improved reliability. As boilers age, they become more prone to breakdowns and require frequent repairs. By purchasing a new new boiler your making an investment to benefit from the latest technology and components on offer. Ensuring a more reliable and efficient heating system.

New boilers in this day and age are built to higher standards and often come with improved controls that can be controlled by your phone depending on model chosen. This Reduces the chances of unexpected breakdowns and improving overall performance.

Energy Savings

Another huge advantage of upgrading an old boiler is the potential for savings on your energy bills over Older boilers due to the natural wear and tear over years of continued use. they will become less energy-efficient Ultimately leading to increased energy bills and higher carbon emissions. Modern gas boilers are designed to be highly efficient, with improved insulation, advanced combustion systems, and better heat exchangers that absorb more heat from the gas it burns to heat your home. By installing a new gas combi boiler, you can make a significant reduction on your energy consumption. This in turn will lower your carbon footprint, and ultimately enjoy huge cost savings on your monthly heating bills.

Cost-Effectiveness

Contrary to common myths, replacing your old gas combi boiler and will be a cost-effective investment in the long run. While the upfront costs may seem daunting. Savings generated through improved energy efficiency and reduced repair costs can quickly offset the initial expenditure. The recent huge increases seen in energy bills since the begining of 2022 New boilers are more efficient. Allowing you to heat your home with less gas. If your current gas boiler is only 60% efficient and you have a 90% efficient gas boiler installed. It stands to reason you will save on energy usage and in turn money on your energy bills. Additionally, modern boilers can be installed with smart controls that optimise heating schedules and temperature settings. This will further increasing energy savings. Over time, these savings will add up, making the decision to replace your old boiler even more financially beneficial.

Warranty Lengths

To provide added assurance, many manufacturers offer extended warranty lengths for new gas boilers. These warranties cover the cost of repairs and replacement parts for a specified period of time, This varies depending on the manufacturer and model of boiler. The length of warranties can range from 2 years right to upto 12 years. Offering great peace of mind and protecting you from unexpected repair costs. When considering a new boiler. It is definitley worth exploring the warranty lengths provided by a variety of manufacturers to ensure you choose a product that’s right for you and best suits your needs.

Upgrading your old gas combi boiler brings several benefits, including enhanced reliability. Energy savings, and cost-effectiveness with improved technology and higher efficiency. Modern boilers provide a more reliable and efficient heating solution. Reducing the risk of breakdowns and lowering energy bills. Additionally extended warranty lengths offered by manufacturers offer added protection and peace of mind. If you’re still relying on an outdated boiler, it’s time to consider the advantages of replacing it with a new gas combi boiler for a more comfortable and sustainable home.

Give Bradford Boiler installation company a call on 01274 317169

fill out your details by clicking here on our contact us page.

We can visit and Diagnose what the issue is and offer a speedy repair.

Back to Blog

Top Four Oil Boiler Issues and Their Solutions.

Oil boilers are one of the best options when it comes to heating properties that do not have main gas available. Advancements in technology have resulted in oil boilers becoming a lot more reliable when installed correctly and giving better value for money. However, just like any device, even after regular maintenance, these boilers can face issues occasionally. Below are some of the most common issues that can occur in your oil boiler and how you can fix them.

1. Oil Boiler Not Starting

If your oil boiler is not starting, the first thing you need to do is make sure that there is enough heating oil in your tank. There are chances that you might have run out of heating oil without realizing it. This usually happens in the winter season when the boiler is used extensively. If the boiler is out of oil then it is suggested that you contact your oil supplier ASAP and arrange for delivery. If your tank stays empty for a long period then it can result in issues in your boiler. Make sure to activate the automatic shut-off of your boiler to protect your device.
After the oil has been added, you need to follow the manufacturer’s reset instructions and proceed accordingly. In most cases, you just need to press a square red button on the side of the burner. However, the process might be different for other boiler manufacturers.
If the boiler does not start even when the tank is full, then check and make sure that the fuse is not blown. If it has, then replace the original one with a fuse of the same rating. If you have followed all the troubleshooting steps in your manual with no luck then you should give a call to a trusted engineer.
A good way to combat an empty oil tank is to get your Oftec registered heating engineer to install an ultrasonic watchman device that can monitor your oil tank levels.
2. Oil Boiler is Starting But Not Heating

A blocked burner nozzle might be the reason behind your oil boiler starting but not heating. The nozzle has a very small gap, which can easily be blocked with dirt or deposit, which is a result of time or bad quality oil. A boiler nozzle should typically be changed once a year and should be integrated into an oil boiler service, if it isn’t then I would consider getting somebody else who is Oftec registered heating engineer to service your boiler.
To make sure that residue in your tank does not harm your boiler; ensure that your boiler is always filled up. This will ensure that no residue is collected in the base. You should also make it a practice to frequently test for water in your tank, particularly if you have an older tank. If nothing works, call your trusted engineer.

3. There is no Adequate Heat

If it appears that your boiler is running suitably but there is not enough heat, then you need to check if the thermostats are set correctly. If they are set properly a dirty air filter might be the reason behind the problem. There is a possibility that lint might have collected in the air filter, which might have blocked or partially blocked it.
It could be that your fan is either faulty or not working as it should. If it appears that the filter and fan are in good condition, then check to make sure you have good air getting to the boiler Go through your oil boiler manual to check if there are any other tasks
you can complete before having to contact an oil boiler service technician and as per the instructions.
The majority of the oil boiler issues can be fully avoided with a yearly boiler service.

4. The Boiler is Producing Smoke and/or Soot

A blocked outlet or inlet pipe or a broken heat exchanger might be the reason behind your smoky or sooty boiler. If you notice this kind of a problem then, first of all, examine the outlet flue exhaust, particularly where it joins with the chimney, and get rid of any dirt, fluff and debris, which might have blocked the exhaust. You should also make it a point to check the gaskets around the inspection door. In some cases, they might be twisted or cracked and this could be the reason behind the soot and smoke, which might be running off from the furnace. It is important to arrange to get the defective gaskets changed. If you cannot find the reason behind the smoke or soot, then it is better to call an engineer.

We are always on hand to help with your Oil Boiler Installations, Servicing and Repairs
Give us a call on 01274 317169 for more information and advice.

Find out more about how Bradford Boiler Company can help with your oil boiler here.

Back to Blog

Why do I Have Cold Radiators?

In your home do you have one or more radiators that are always cold or just lukewarm?
If so, here are a few simple tips to cure the problem.

What to check first:

Firstly check the pipework coming up through the floor to your radiator. If the pipe on one side is hot coming into the radiator, but no heat is coming through, then your radiator valves will need looking at. In a lot of cases, it will be the thermostatic radiator valve (TRV) where the pin is stuck in the valve or is corroded to a point where it won’t open. This will either need freeing or the TRV will need replacing. This will involve draining the central heating system to change it.

If the pipes are cold coming into the radiator:

The first thing you need to do is turn your central heating on and let the system heat up. Once the central heating system is warm, turn off all the other radiators, except the one that is not getting hot. Hopefully, you may hear some gurgling noises and heat start to come through the pipework. If this is the case you may have had an airlock due to uneven pipework under the floor. This is very common in open vented systems where you have a tank in the loft that supplies your heating system with water.

Leave your boiler running for about 10 minutes then re-check the radiator for heat. If there is still no heat coming through the radiator, change the TRV valve. If a new Valve does not cure the problem then it is most likely there is a blockage somewhere. This is where you will need to call the professionals in to investigate the problem. More than likely, the system will need a flush. For more information on this click here.

No radiators are working in my home:

If your radiators are not heating up and your boiler is working, you will need to check the central heating pump is working. A central heating pump distributes heated water from your boiler around your home’s central heating system. For this, we would recommend calling in the professionals. A common symptom of a failed pump is that you will hear popping and banging noises inside the boiler as the water boils but cannot be moved because of a failed pump.

One or more radiators are hot at the bottom, but cold at the top:

If this is the case, you will need to bleed the radiator to remove the air. Once this has been done and the air has been removed, the radiator will heat up again evenly across the top of the radiator. Remember If you have a sealed system, for example, a combi boiler, you will need to add some water back into your central heating system via the filling loop.

One or more of my radiators are hot at the top yet cold at the bottom:

The most likely cause of this is sludge within your radiators and central heating system. If this is the case you will need to call the professionals in for this one, this is something we would recommend getting the professional in to diagnose and rectify and not really something that should be done without the correct training and equipment. For more information on this click here.

Back to Blog

What Is a Powerflush?

A Power Flush is carried out by your heating engineer to remove magnetite sludge, rust and other debris & contaminants from your central heating system, allowing it to work more efficiently.

When contaminants are left untreated and circulating within your central heating system, it leaves your heating system inefficient, causing boiler breakdown issues and in some cases, a new boiler may be required if the sludge settles and causes damage internally. Sludge and debris in your central heating system is the main cause of blockages, preventing heat from circulating which causes ‘cold spots’.

What is a Power Flush?

We use a machine that is connected to your central heating system which pumps water and cleaning chemicals around the system at a higher velocity than a normal central heating pump, allowing it to shift the sludge and contaminants. A cleaner is added into the system that contains a range of chemicals designed to remove the sludge and contaminants. Each radiator should be worked on individually to ensure you are getting the best results.

To do this, we shut off all the radiators on the system except for the one we are working on at the time. Once the machine is only working on one radiator, we none-aggressively agitate the radiator using high strength magnets. Once this is done, we reverse the flow of water going into the radiator every few minutes to help shift the sludge and debris even more. This whole process takes around 15-30 minutes per radiator depending on the size of the radiator & the state of the system.

How do I know I need a Power Flush?

The most common signs you may need a power flush are:

• Cold areas or spots on radiators – mostly at the bottom

• Loud/banging/hissing noise from the boiler or central heating pump

• Pipes are hot but the radiators are cold

• Your Boiler is overheating and your boiler constantly needs to be reset to work again.

• Some radiators are hot and others aren’t

• Lots of black water comes out when you bleed a radiator

If you have any of these issues with your central heating system, you need to get it looked at by a heating professional. While a powerflush may fix your heating problems, unfortunately the damage may already have been done and a new boiler may be required as well.

Benefits of having a Powerflush:

• Radiators will warm up faster

• A more efficient central heating system & cheaper energy bills

• Your radiators will get hotter

• Quieter Boiler and Radiators

• Increased lifespan of your boiler/central heating system

• increased boiler reliability, so less chance of your boiler breaking down

Will a magnetic filter do the same job as a powerflush?

A quick answer, No.

A magnetic filter should be fitted as standard with any boiler and it will definitely need one after a power flush has been completed. The filter will then protect the system from future sludge build up. A magnetic filter should be cleaned annually preferably at the time of a boiler service, we always make sure to do this as part of a boiler service. It is also very important to keep the system dosed up with chemical inhibitors. Again, this should be added during the boiler service when cleaning the magnetic filter.

What is the cost of a powerflush?

The cost of a power flush will vary depending on a number of factors:

• The amount of radiators on the system

• The complexity of the heating system set-up

• Age of the the system – radiators/pipework/boiler

The cost will vary from £500-£1000. An average system of 10 radiators will normally be around £600-£700, plus a magnetic filter if there isn’t one currently fitted on your heating system. This will typically add around £150 on to the power flush job.

Back to Blog

Why is my Boiler Losing Pressure but I can’t Find a Leak?

It’s almost inevitable that your boiler is going to have a problem sooner or later, the most common issue is having low water pressure. If this is the case for you, this guide should help you be on your way with a fixed, working boiler in no time.

What does an Expansion vessel do?

When water is heated up it expands in size by approximately 4%. This expansion has to go somewhere. On a combi boiler, it has an expansion vessel to take up this expansion of water.

When the expansion vessel is faulty it will cause a rise in pressure when your boiler is heating up your radiators.

What is an expansion vessel?

An expansion vessel is a steel vessel within the boiler. Inside the vessel is a rubber diaphragm with your central heating system water on 1 side and air (sometimes nitrogen) on the other side.

How does the expansion vessel work?

The expansion vessel works in the following way. When the water is heated through your boiler when your heating is on it will start to expand within your radiators, pipework and boiler. That expansion has to go somewhere, so it expands into the space that is occupied by the air in the expansion vessel. The air compresses in the vessel. As the water cools down the air pushes back into its normal space.

How do I know if my expansion vessel is faulty?

The first signs are when your heating is on, the pressure will rise on the gauge on the front of your boiler.

When your boiler gets to 3 bar in pressure on the gauge this will activate the pressure relief valve. The water will be evacuated through the pressure relief valve that is preset to operate at 3 bar of pressure for safety reasons.

When the boiler cools down the pressure will go back down to zero bar pressure.

It’s at this point your boiler will go to fault mode for low pressure and you need to fill the system back up with water.

The outlet for the pressure relief valve is commonly on the outer wall of your boiler. You should be able to see water coming out if activated or a wet patch going down the wall from the outlet. If this is happening on a daily basis you really do need to get this fault rectified.

Adding fresh oxygenated water all the time will cause a lot of rust corrosion to the system which is not advisable for the long term health of your central heating system.

There are other causes for your boiler losing pressure with no sign of a leak.

This could include a cracked and corroded primary heat exchanger and ground floor leak that is not viewable without taking floorboards up or possibly the pipes have been laid in a screed of concrete without suitable protection causing pinholes due to corrosion.

If you suspect you have a leak it is best to get it investigated as soon as possible.

Call today on 01274 317169

Back to Blog

A Guide To Low Water Pressure For Your Boiler

It’s almost inevitable that your boiler is going to have a problem sooner or later, the most common issue is having low water pressure. If this is the case for you, this guide should help you be on your way with a fixed, working boiler in no time.

This problem can be easily identified yourself and rectified with ease, in most cases by simply adding more water to your central heating system, commonly known as topping up. When there is a loss of pressure the boiler will go into fault mode to protect itself from any potential damage while running on low water.

To top up the boiler you simply need to add water through a filling loop. This is generally done by opening 1 or 2 valves to release water into the central heating system to fill up the radiators. This could be a manufacturer’s in-built filling loop that is connected to the boiler or an aftermarket filling that in most cases is fitted just below the boiler. Here is an image of an aftermarket filling loop.

As you can see from the picture the 2 black handles will need to be opened to allow water to be added to your central heating system. Do this slowly as the water gauge can go up very fast and you could end up having too much water in the system. Water will also naturally dissipate over time in the system and need a refill generally between 6 and 12 months but can be longer.

Afterwards, you should bleed the radiators, to release any air and allow the whole radiator to heat up.

Once this is done, the first thing to look at is the pressure gauge dial on your boiler, this will give an indication of how much pressure there is in your central heating system. If you don’t have a pressure gauge on your boiler then this may be displayed on a digital control panel on the front of the boiler. Ideally the pressure reading should be between 1 and 1.5 BAR, the unit that pressure is measured in.

Low water pressure can occur naturally over time or may be a result of a leak on your central system pipework and radiators or it could be an fault within the boiler. Please see our future posts for information on these issues.

Your digital control panel may display an error code if you don’t know what it means, see the list below of the most common errors and their meanings:

(F1) – Ideal
(E118) – New Baxi/ Main & potterton
(E119) – older Baxi/ Main Potterton
(F37) Ferroli
(ER04) – Biasi
(0.0) – Intergas
(F22) – Vaillant
(A281) or (EA338) – Worcester Bosch
(F22) – Glow Worm
(1P4) & (108) – Atag
(37) –  Johnson Starley
(10) – Alpha
(e302) Navien
(108) – Ariston
(21) – Saunier Duval
(E08) , (08E) , (F83) & (28) – Ravenheat
(Al02) – Sime
(AL40) , (AL41) & (A04) – Vokera

If your boiler is not showing any error codes it doesn’t mean it is fine as not all combi boilers will show an error code, some of them use a system of flashing lights to give you an error code. If you are unsure, it is always best to give us a call so we can help further.

Common causes/checks of low water pressure.
The boiler will naturally lose pressure over time due to the constant heating and cooling of the water. In this case you shouldn’t need to fill up the system more than every 6 -12 months, sometimes even longer.
You have a leak on your central heating system. The most common places to look are on your radiators, checking the valves at the bottom of the radiators and the bleed valves and caps at the top of the radiators. A common thing to look for is an orange/rust coloured stain around the valves.
If you have access, look at all the pipework, giving a good look around and under the boiler.
Check underneath the boiler itself.
Check your ceilings, you may see a damp patch indicating a leak from pipework or a valve where the water trickles down the pipe.

If you have exhausted these issues then it may be that your boiler is leaking internally. In most cases this will be a cause of a faulty expansion vessel. This is the vessel that works by taking up the expansion of water when it is heated. If it is faulty there is nowhere for the water to expand so the pressure will rise and when it reaches 3 bar on your dial the pressure valve will activate and evacuate the water outside your home. You will commonly see this pipe on the outside wall to where your boiler is installed.

*****Fun Pub Quiz Fact***** water expands in size by approximately 4% when heated up-to 100 degree’s centigrade.

If you have any questions or are still uncertain how to check or fix low water pressure, feel free to give us a call and we will be more than happy to help you get the issue sorted out.

Back to Blog

Top 5 Common Vaillant Fault Codes

Is your Vaillant boiler showing a fault code and you have no idea what that code means? Having a faulty boiler always seems to happen at the worst times and when you need it the most. Generally this is in winter because it’s when your boiler is used the most. So from our experience at the Bradford Boiler Installation Company here are the top 5 error codes that come up on a Vaillant boiler display.

Vaillant were the first manufacturer to develop a combi boiler and have been at the forefront of combi boiler technology ever since. They have a great reputation for manufacturing and reliability. Vaillant is the only brand to have been awarded the Quiet Mark accreditation by the International Eco-Award Scheme to manufacturers of the quietest products. Vaillant has dedicated engineers for warranty repairs and have dedicated training centres across the uk for engineers to keep their knowledge up to date with their boiler advancements.

Fault 1: Code F22

When F22 shows on the boiler display this indicates the water pressure is low. You can check the pressure gauge dial on the front of your boiler if it has one, or newer models the digital display will show how much pressure is in the system. Once topped up to the desired pressure the error F22 error code will disappear. In some instances you may have to press reset on the boiler. Ideally the pressure will need to be between 1.0 and 1.5 bar. This is an easy fix that anybody can attempt however if you put too much pressure in the system don’t panic. Just bleed a radiator till the pressure drops to the required level.

Newer Vaillant Boilers have a built in filling loop under the boiler. These levers are grey and there will be two of them, one either side directly underneath the boiler. They will have closed written on them. Each valve (lever) should be in the quarter to 3 position (imagine it being a clock) open the right valve first to the 12.30 position then open the left valve till you have the desired pressure.  

Watch this video from vaillant to see how easy it is.

https://www.youtube.com/watch?time_continue=44&v=Pv-SMJQO6XE&feature=emb_title 

Fault 2:  F75

If you get F75 showing on the boiler display, this is probably going to be the pressure sensor that is blocked and cannot detect the pump spinning and the increase in pressure when the boiler goes to fire up. It may also be a faulty pump. This commonly happens on boilers and systems that have not been properly flushed to remove sludge or have not had a magnetic filter fitted. The easiest solution is to get a Gas Safe Engineer to replace the sensor.

Fault 3: Codes F27 & F28

These two codes commonly refer to a frozen condensate pipe. Generally this is the white drain pipe underneath your boiler that goes outside to a drain and it has frozen in the cold weather. This causes a build up of water that backs up to the boiler causing it to stop working/ lock out to error and f27/f28 will appear. This is generally an issue because the waste pipework is not a large enough diameter or the pipe is run horizontally or slightly uphill causing the waste pipe to freeze in very cold weather.

An easy fix is to run hot water from a kettle over the pipe to defrost the ice. This may take a long time and in extended bouts of freezing weather it will repeatedly freeze up. You could disconnect the pipe under the boiler if you feel confident enough and put a container there to catch the water. Beware when doing this initially there will be a lot of water. 

The ideal situation is to either upgrade the pipe to a larger diameter or consider running the pipe to an internal waste if possible or consider a trace heating kit that activates in freezing weather to stop the pipe freezing up.

Only attempt these fixes if you feel confident to do so, if you’re in doubt, always use a Gas safe Engineer.

Fault 4: Code F28 (Vaillant Turbomax)

This fault is very common for the Vaillant Turbomax, caused by a faulty ignition, or no gas getting to the boiler. The faulty ignition leads to no spark being generated. Alternatively there may be a gas valve issue or if you are on a meter check you have credit as you may have run out of gas.

In this instance you will need to get a Gas safe Engineer out to fix the issue.

Fault 5: Code F62

Before being able to fix the fault, a heating engineer will first need to find the cause, because there are several possible reasons why you’re seeing the F62 error, such as:

The gas valve is jammed stuck
There is an issue with the PCB (printed circuit Board) communicating with the gas valve.

In some instances both gas valve and PCB can be at fault. You will need the services of an Engineer to determine what the underlying cause of this fault is.


You can check our credentials here:

https://gassaferegister.co.uk/find-an-engineer/check-a-business/?id=ilkLIG9N7v4lWTog1be91g%3d%3d